With Edit Mode, you can edit Barn Sheets when you need to correct for errors entered during the life of a group or update a missed Daily Checkup.
On This Page:
Farm owners, caregivers, managers, veterinarians, and admin users can edit barn sheets for all farms they have roles on.
When Barn Sheets Editing Constraint is enabled in the Admin Section, Caregivers will not be able to make changes to a past Daily Checkup.
Editing Barn Sheets on desktop and laptop devices
1. Click on the Barn Sheet link on the left-hand menu.
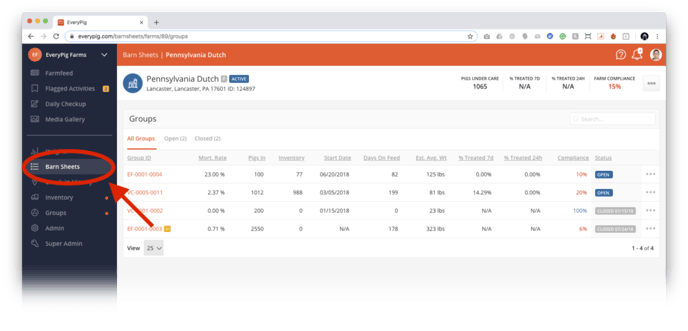
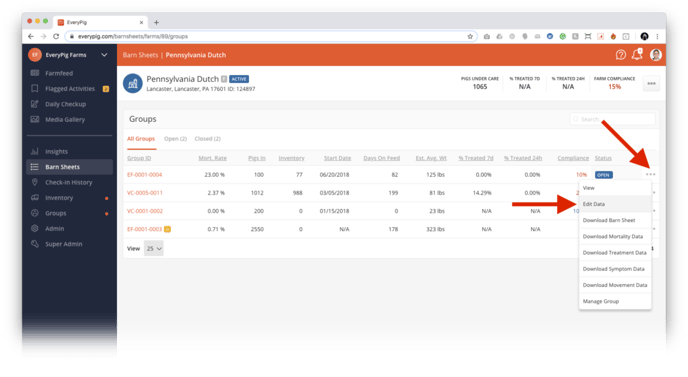
2. Locate the group you would like to edit and click on the three dots you see below. Then select “Edit Mode” from the options listed.
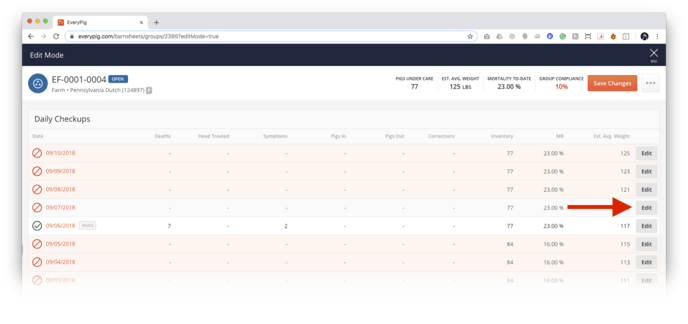
3. Now you have entered “Edit Mode.” From here find the Daily Checkup you would like to edit and click the “edit” button.
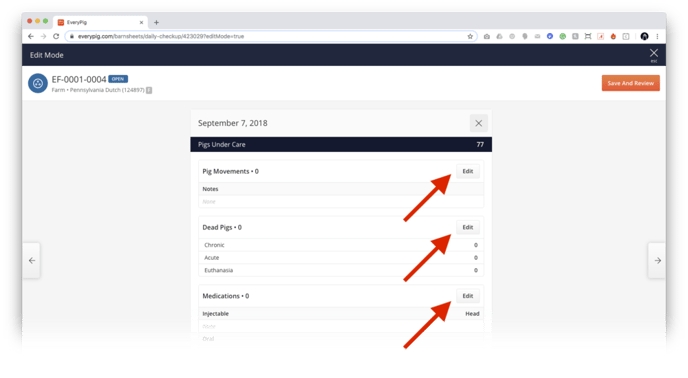
4. Find the section of the Daily Checkup you would like to edit and click the “Edit” button.
As a user, you can edit mortalities, pig movements, medications, symptoms, high/lows, water usage, notes and you can upload media post-fact to old Barn Sheets.
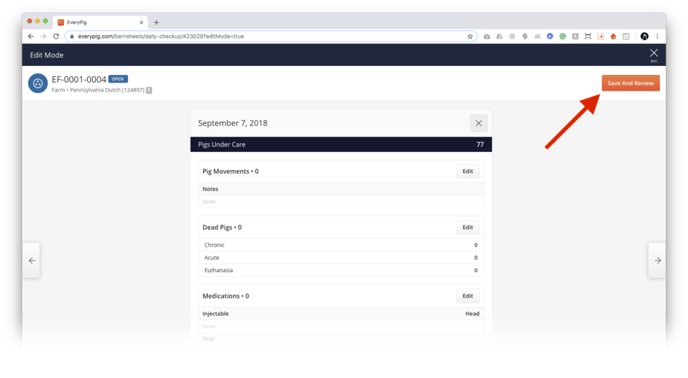
5. When you’re satisfied with your edits, click the “Save And Review” button.
When you save changes you will be asked to reconcile the data you amended, this will require two reconciliation steps.
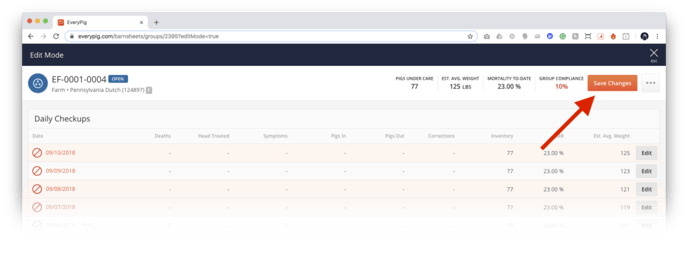
6. Before you finish, you’ll need to review the Barn Sheet to ensure everything looks right. When you’re satisfied, click the “Save Changes” button.
When users tag/mention users on the Daily Checkup in Edit Mode, notifications will not be sent to users mentioned.
Editing Barn Sheets on mobile devices
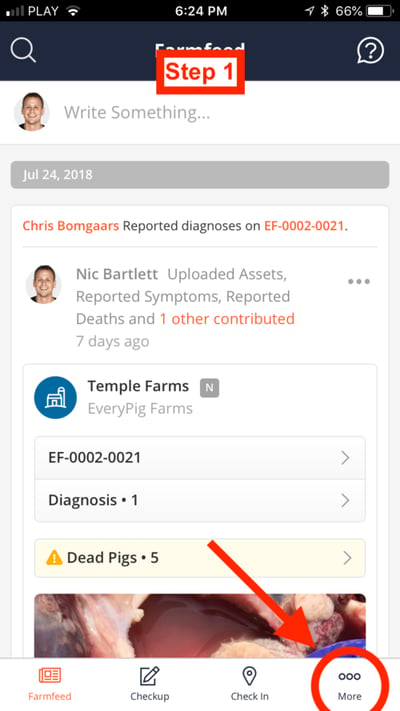
1. Tap on the "More" Menu.
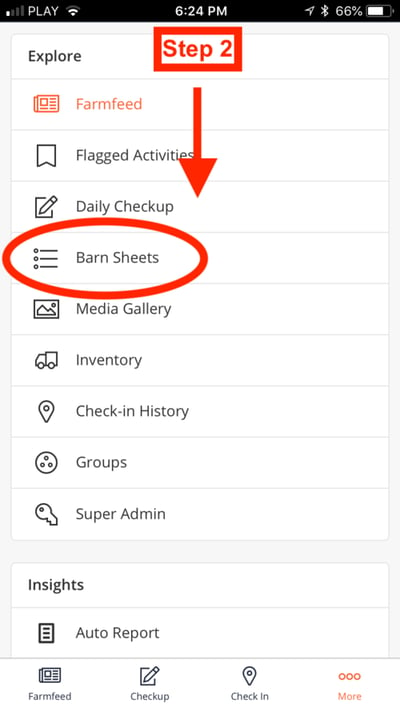
2. Scroll down and tap on the Barn Sheets Link.
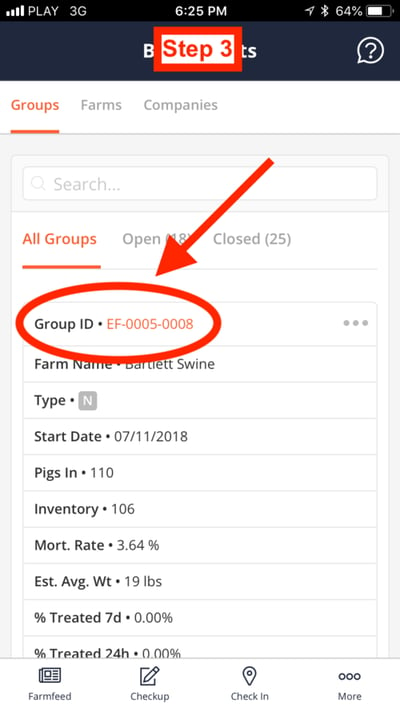
3. Find the group you would like to edit and tap on the group name.
You can search by group ID using the search box provided.
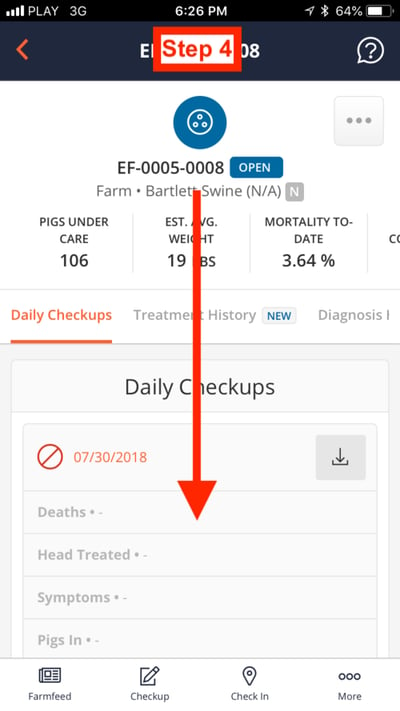
4. Scroll down the Daily Checkup you would like to Edit.
5. Tap on the "Edit Checkup" link on the day you would like to edit. 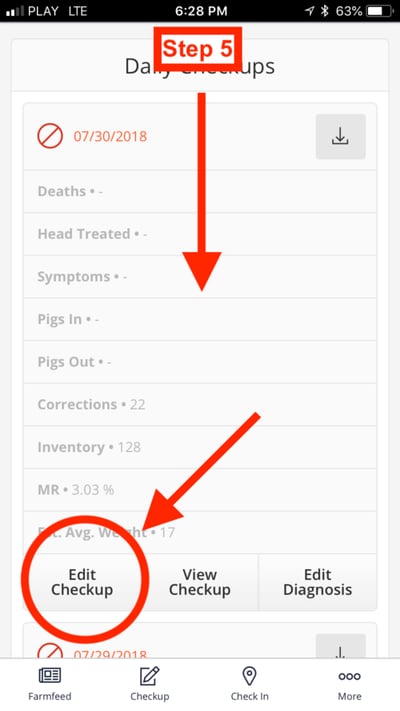
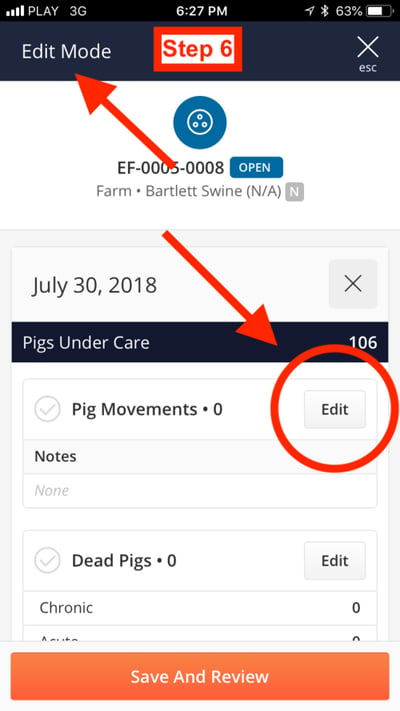
6. Find the section of the Daily Checkup you would like to edit and tap the "Edit" button.
You are now in "Edit Mode." To exit edit mode, click on the (X) at the top right.
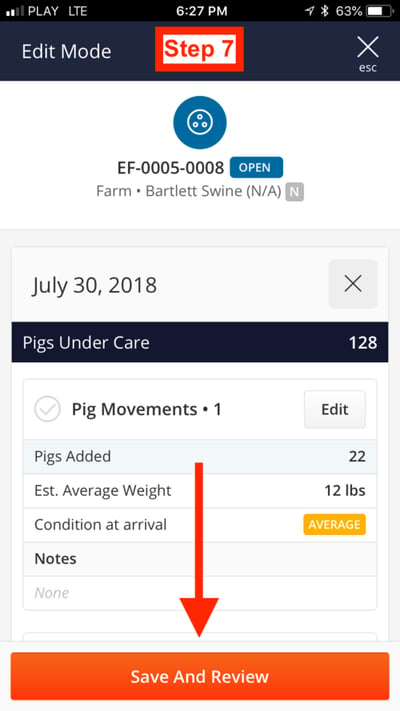
7. When you're done editing, tap on the large "Save And Review" button.
When you save changes you will be asked to reconcile the data you amended, this will require two reconciliation steps.
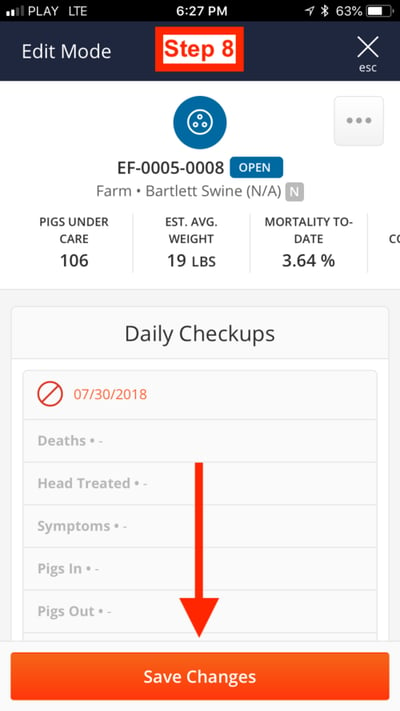
8. Finally, when you're ready, click the large "Save Changes" button to complete the process.
